
In my first attack on Glandeh, I'm a little cocky and just charge straight in, ignoring the fortification bonuses. The fortification level of a city can be reduced by a siege, but if you just attack then it provides an extra layer of armour on top of all defending units which must be cleared before you actually start dealing damage to the unit. In addition, I was a little surprised to see the Necrophage militia prove moderately effective against my units (in past experience city militia has been utterly useless, but maybe that's because I wasn't investing in city defence upgrades and neither were my opponents).
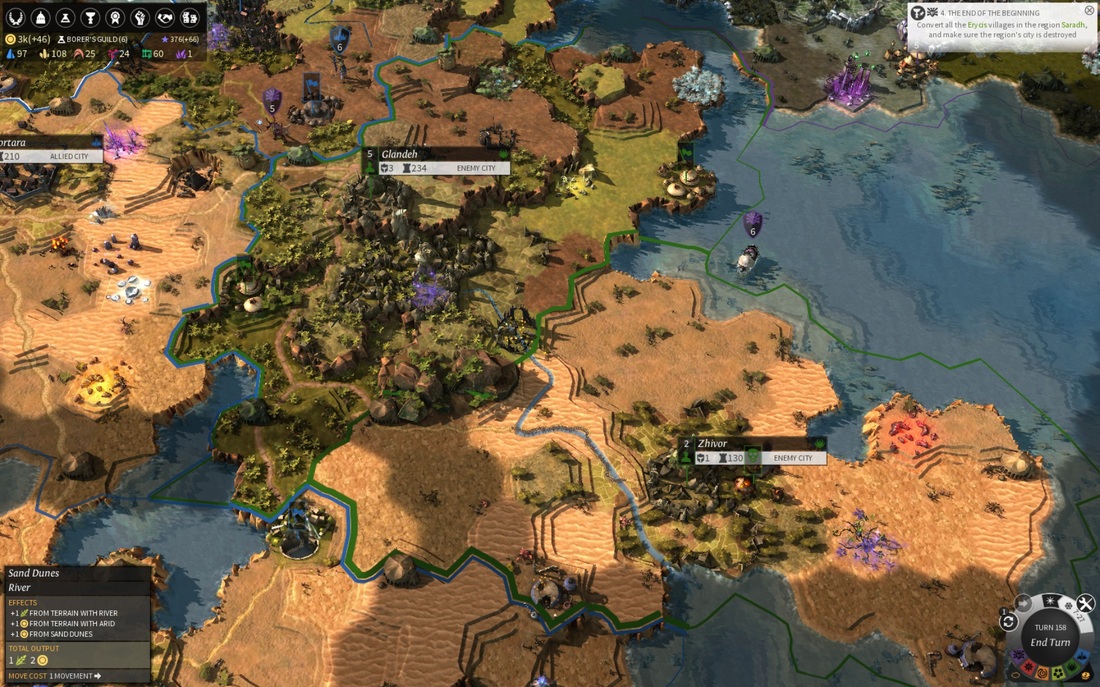
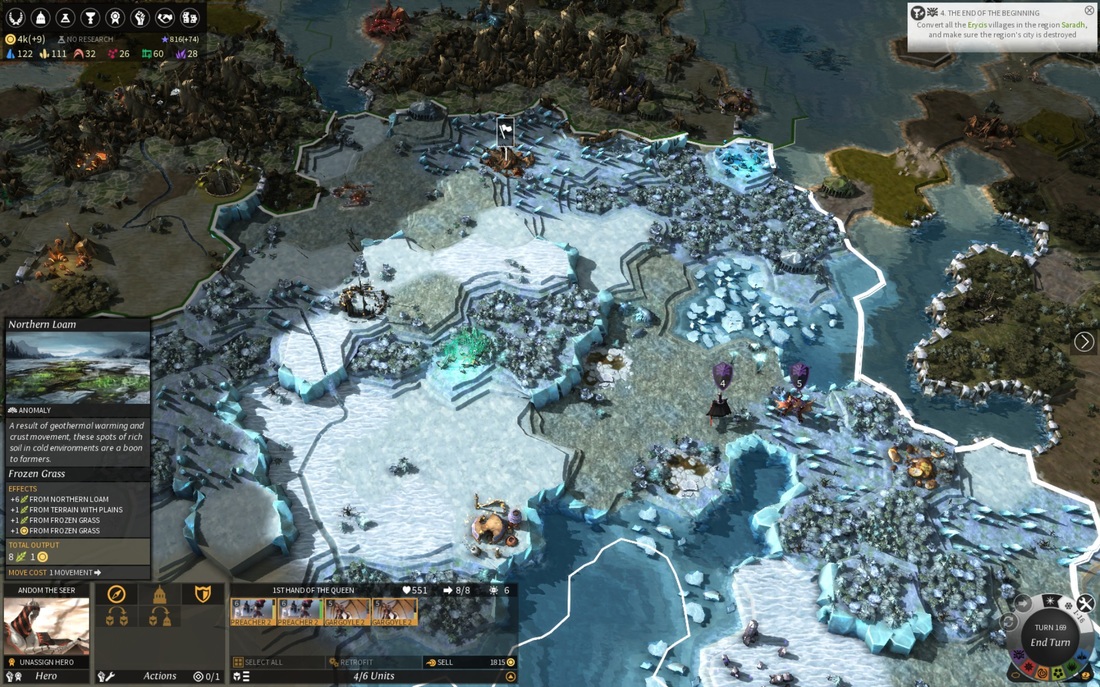
Last time we had just forged an alliance with our former foes the Broken Lords, and were preparing to wage war against the Necrophages, with the ultimate goal of conquering the region of Saradh and converting all the villages there, thus achieving the next step in our faction quest. I wait until the end of winter brings better weather for campaigning, and then eye up our first targets: the cities of Glandeh and Zhivor, both colonies on the continent we share with the Broken Lords. Their defences are weak and I don't see any Necrophage armies nearby.
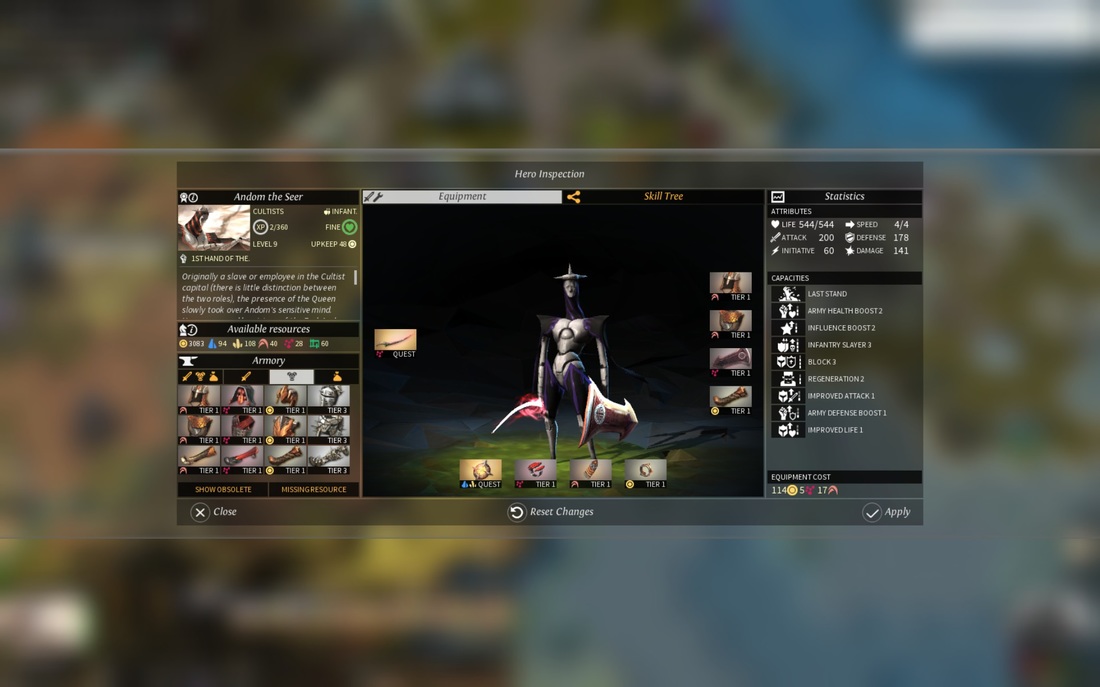
But this was also only my secondary army of basic village recruits, while Anton the Seer is leading my primary force. I upgraded Anton's equipment while he was back at Citadel, and his force is now mostly the latest Gargoyle units with modern weapons (though still only basic armour for now). He leads an attack on Zhivor and easily crushes the single militia unit defending.
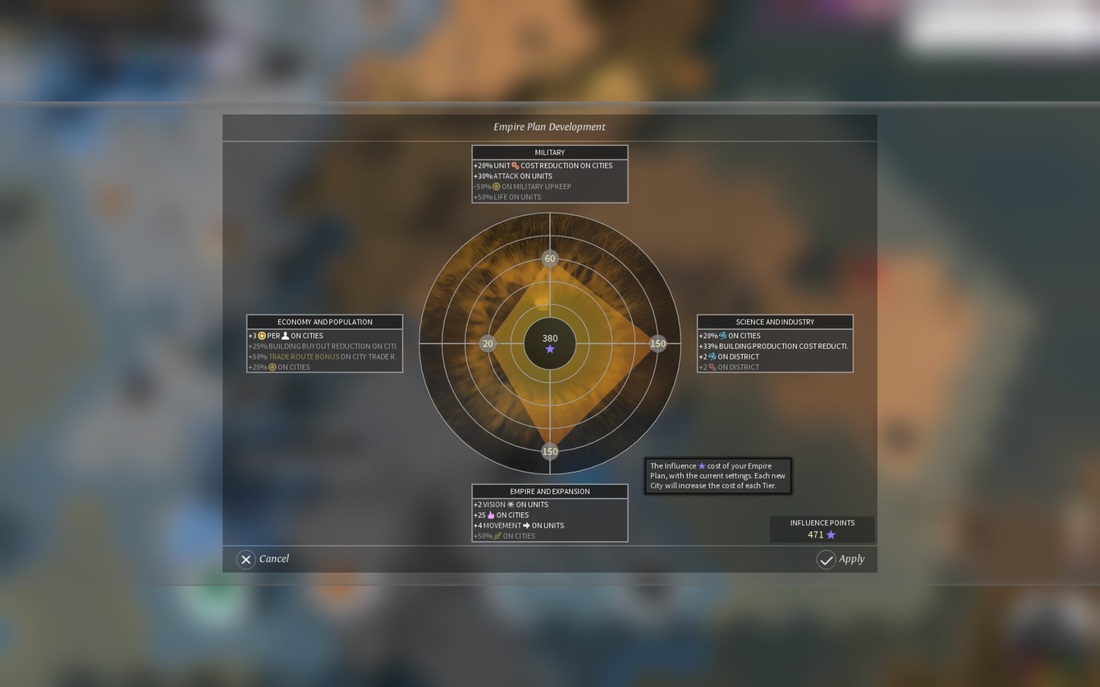
I spend a lot of influence points so that I get +30% attack and +4 movement in addition to my usual choice of bonuses. I also activate Blood Crystal and Quicksilver resource packs to gain XP growth bonuses and even more extra attack. So far I'm feeling good about this war, but then we haven't met a real Necrophage army yet...
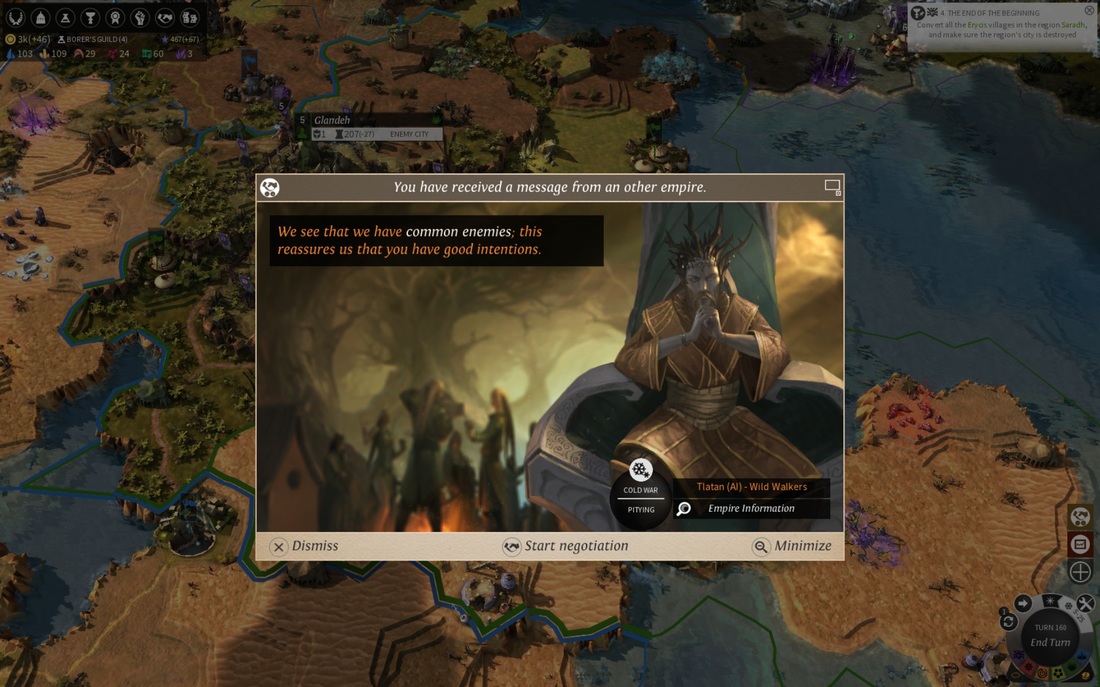
It's worth noting here that the Necrophage, as voracious devourers of everything they can get their hands on, cannot ally or make peace with any other nations. I get a message from the leader of the Wild Walkers commending me on joining the fight against them. This was also a factor when I decided to go for Saradh - they weren't going to have any allies who might join the fighting, and I was unlikely to anger anyone by attacking them.
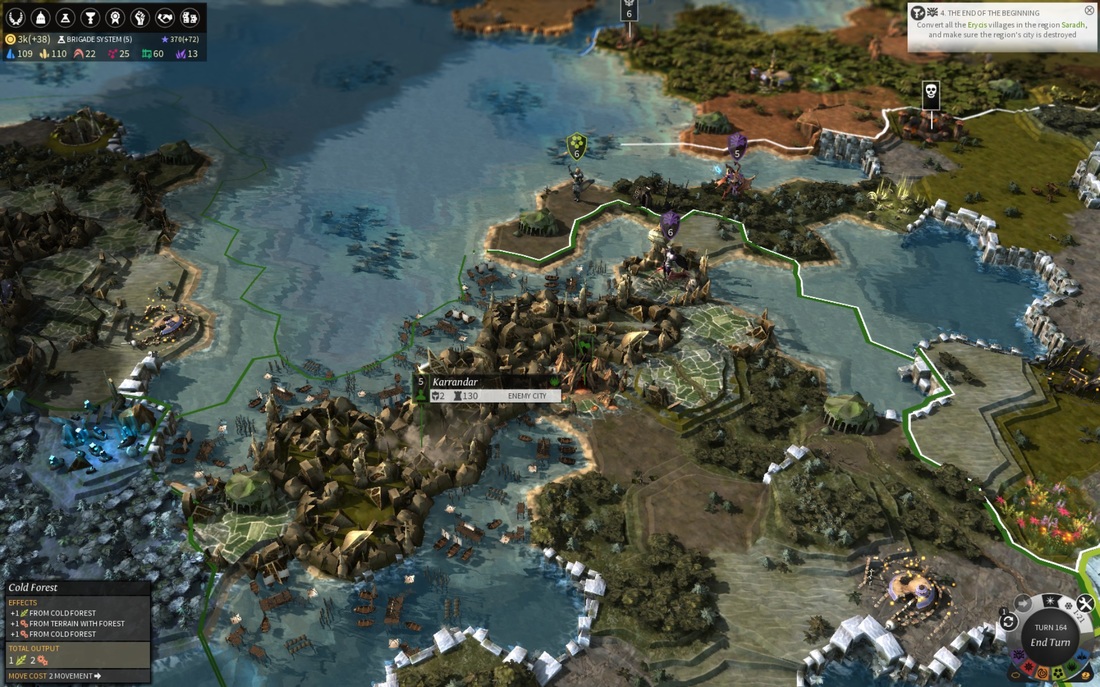
Before long we land near Karrandar, a small weakly defended city, and burn it. We meet the first of their real army units - Necrodrones, which I wrote about having problems with in my first playthrough. Given the superiority of my forces I auto-fight this battle so don't see exactly how they perform against my troops (probably a mistake, but it's Sunday and I'm feeling lazy) , but one of my Gargoyle units does take a fair bit of damage.
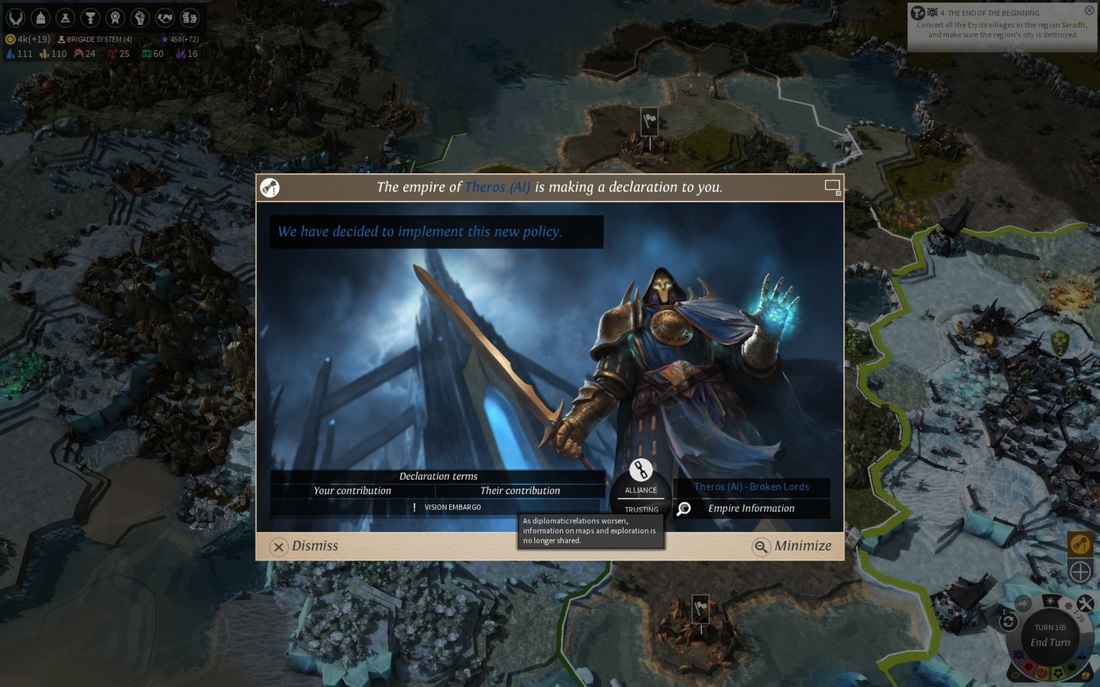
I haven't brought the Broken Lords into the war because it seems things have changed - our relationship is only 'Trusting' now, rather than 'Blood Brothers', and it'll cost me a lot of influence to even suggest them joining the war, and that doesn't include whatever influence costs there will be to the various gifts that would then be necessary. Things worsen further as they cancel our vision sharing arrangement. I may gift them some technology to seem generous, but I'm not sure how effective that will be. They seem a little capricious.
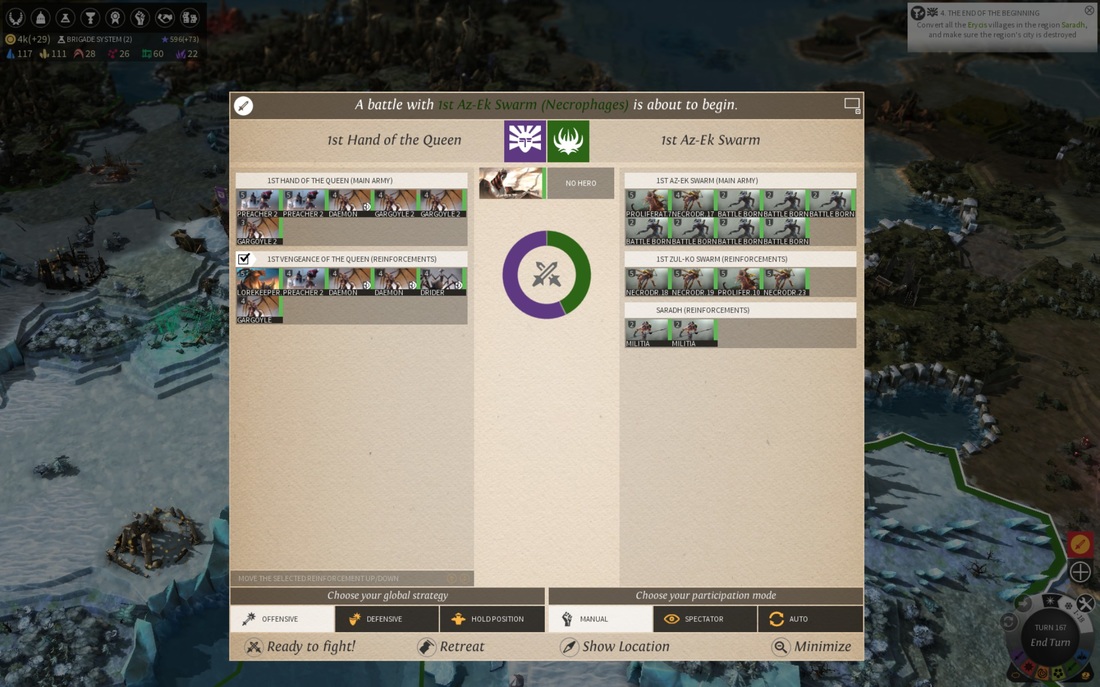
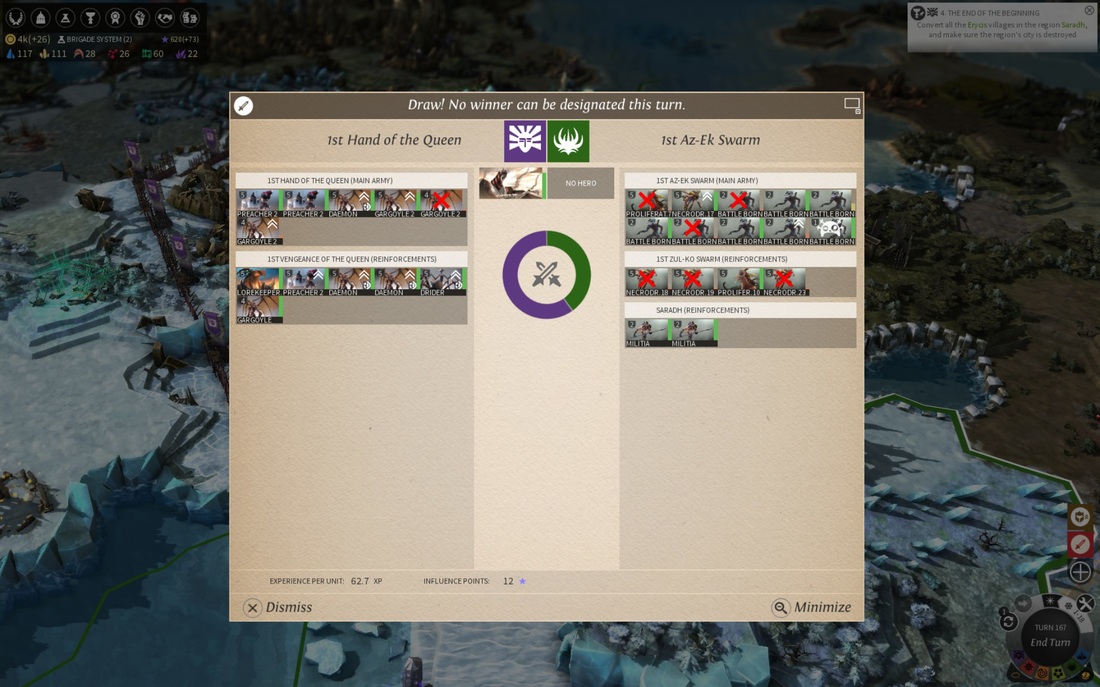
We finally approach our target of Saradh, and here things are going to get difficult. The city itself is established and well fortified with six units defending as well as the militia. On top of that, a huge army of Necrodrone Battleborn is nearby, led by a Proliferator support unit, but at least I don't see any heroes in the area, and those Battleborn look to be fairly basic units without much experience. I lay siege to the city, and await their response.
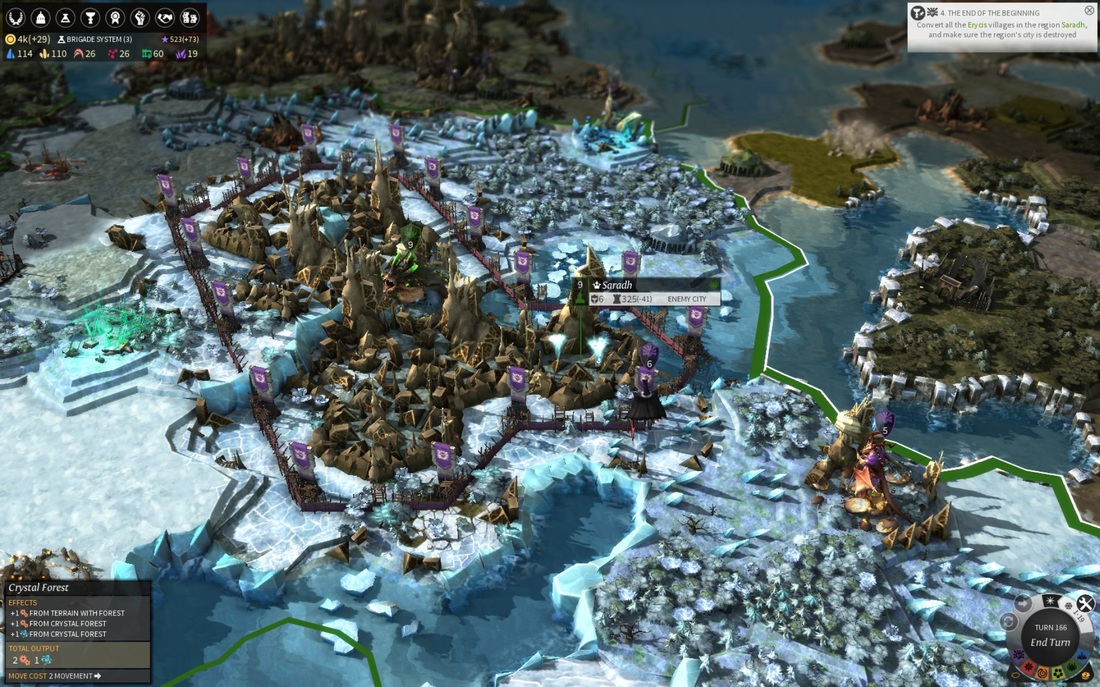
Battle! It seems the defenders in the city were Necrodrones and another Proliferator, but we still have something of an advantage according to the balance of power.
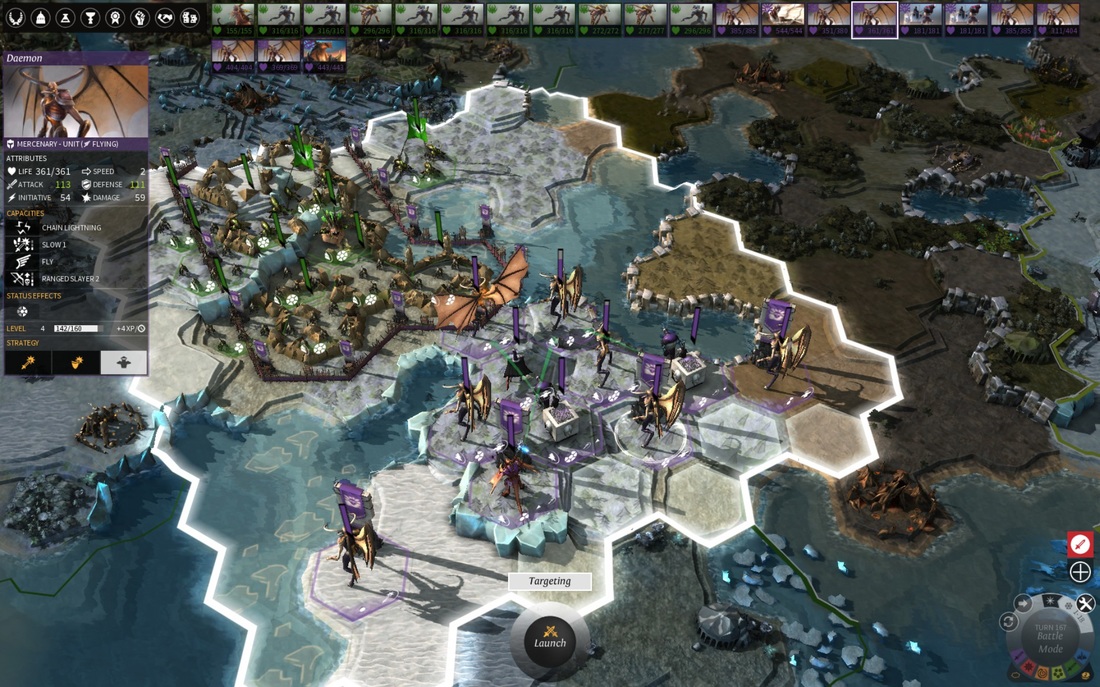
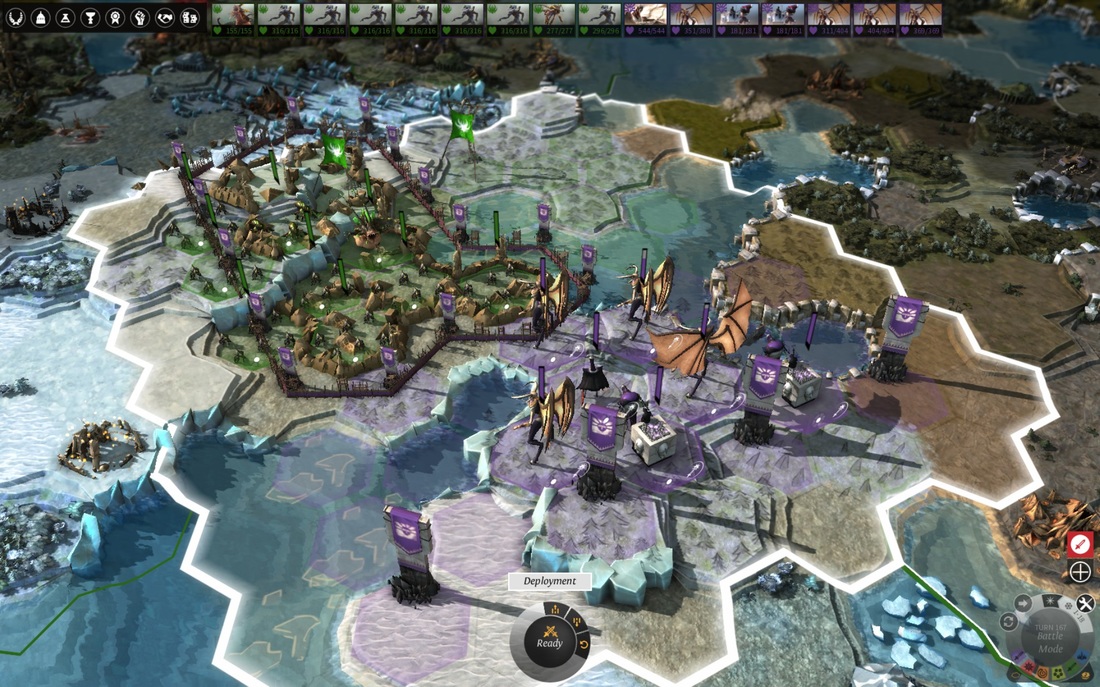
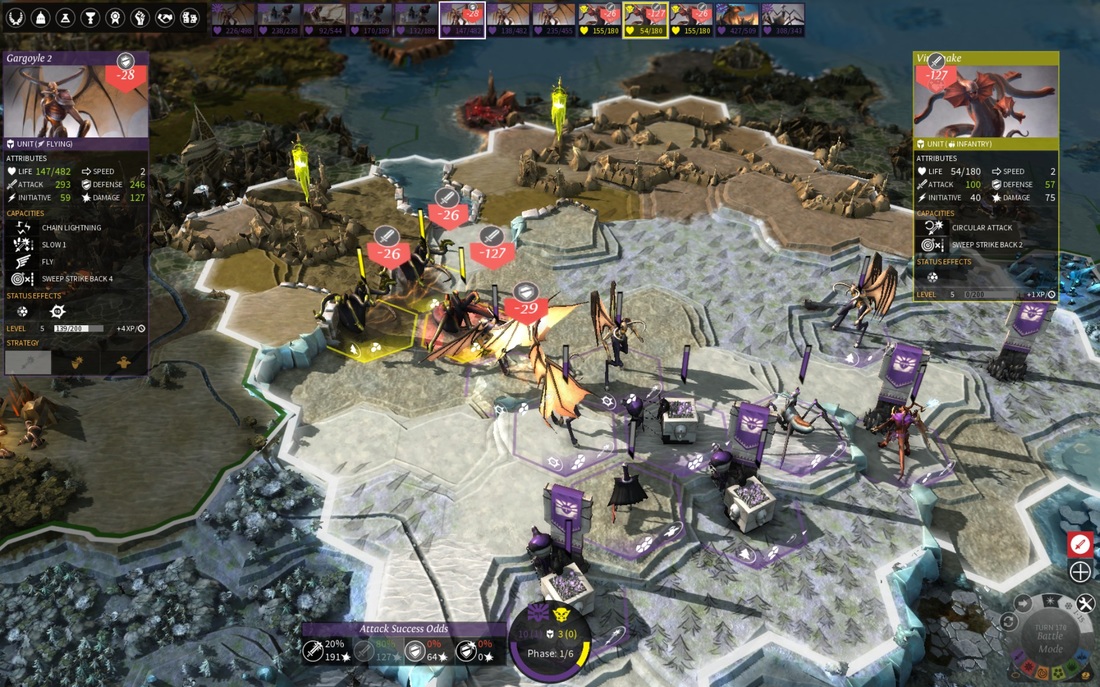
I'm very happy with the layout of the battlefield. A tiny chokepoint will prevent their numbers overwhelming us, but hopefully their Necrodrones will be tempted to fly over and engage anywhere, allowing us to pick them off piecemeal. I'm also very pleased with the two extra reinforcement points I get from one of Anton's skills. I didn't think it would be much of an ability, but in larger conflicts I can see how it'll be very useful.
They start with some frankly poor unit placement, and one of their Proliferators is annihilated by a counterattack from a Gargoyle.
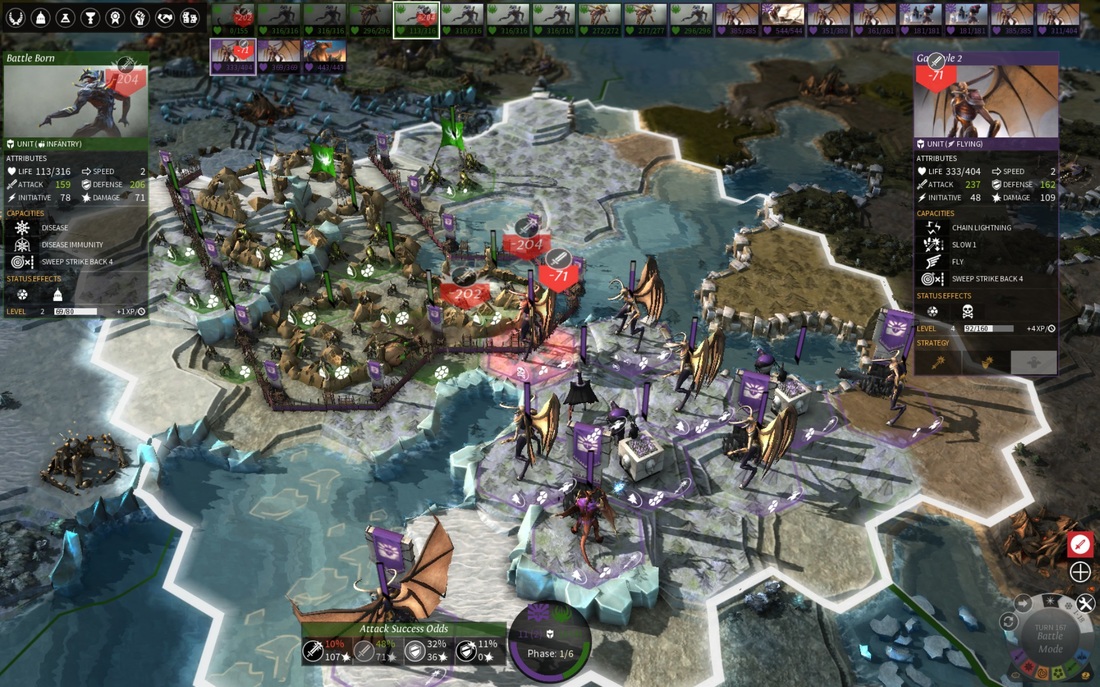
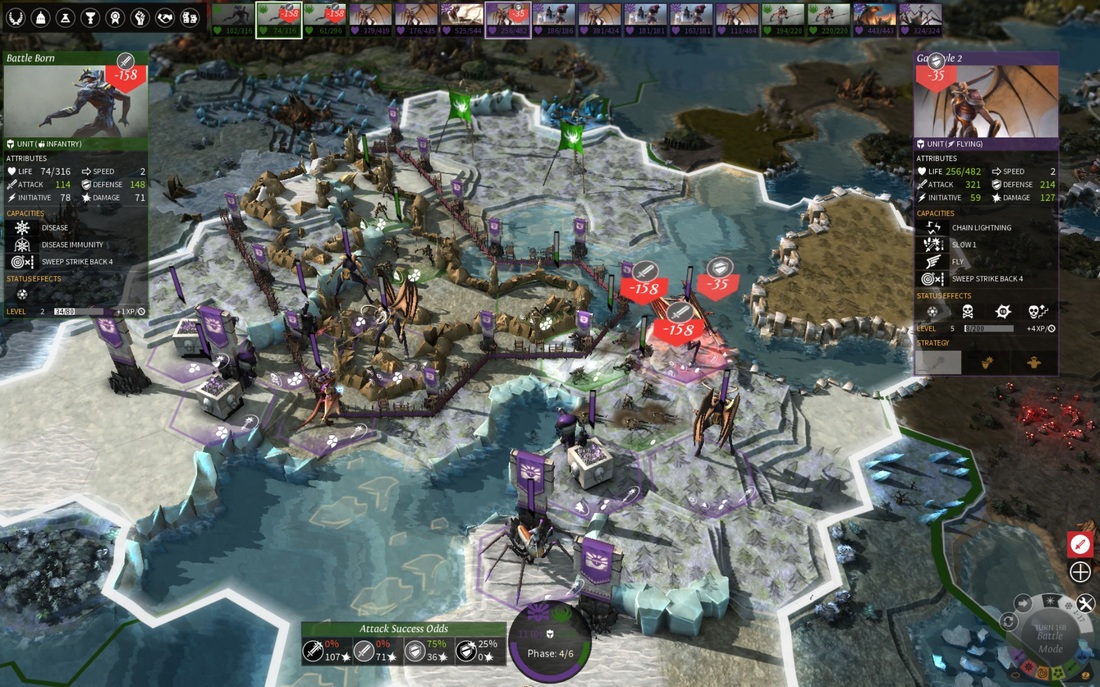
The other one stays over their side of water and bombards my units, poisoning them at the same time - this battle indicates a need for me to get some good ranged units - I have a unit variant I can research, so I might have to do that. But it's not enough to dislodge my defending Gargoyles, who use their Sweep Back Strike to good effect against the waves of attackers.
The Battleborn and Necrodrones don't prove to be too fearsome. I lose one unit of Gargoyles and another almost dies, but their losses are far greater. I'm tempted to launch an attack on the city soon rather than risk them bringing in reinforcements that might change the situation, but the fortifications are still too strong. It's also worth noting that when you do enough damage to clear the fortification armour on a unit, any excess doesn't go into health, it's just lost. This means that even if the enemy only has one point of fortification, every first attack on them is going to be blocked.
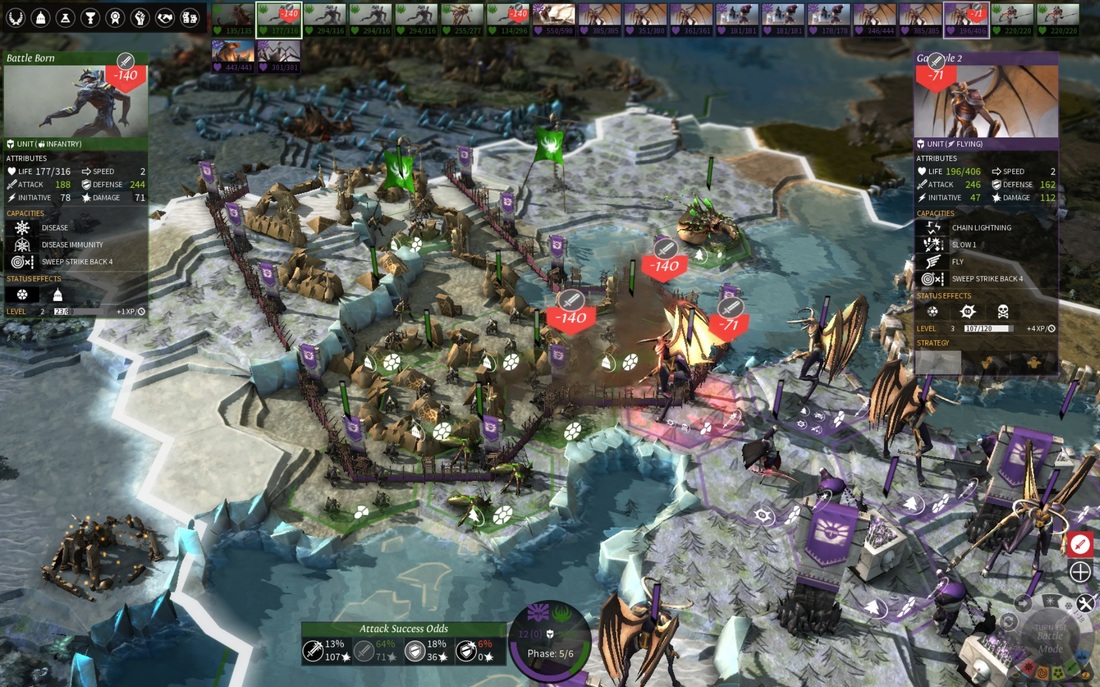
Next turn they sally forth again, and this time my starting position is a little different because of moving my armies so they could both besiege the city - we're both sides of the chokepoint now. What follows is a rather bloody, confusing battle where my units alternate between performing well and badly due to a variety of factors I can't really recall.
I think the tutorial went into some detail, but it's been a while, and there's plenty of status effects going on that aren't super clearly explained even in the tooltips. After the battle I check my unit designer and find that my Prophets give a +10% bonus to all kinds of good stats with their buff, but for some reason it doesn't show all that if you mouse over the 'Unleashed Potential' feature in the battle itself - fine if you know what it does, but for the enemies I can't check the exact details in the unit designer.
At the end of it, my army is battered but mostly still alive, while every single unit of theirs has been decimated. Irritatingly, this doesn't mean I can just take the city. Despite the fact I have it under siege, a nearby army of theirs outside the wall still gets the fortification bonus if I try and attack - doing so seriously damages my commander and costs me another unit for only killing a couple of Battleborn (notice how the balance of power bar suggested it would be totally in my favour for some odd reason).
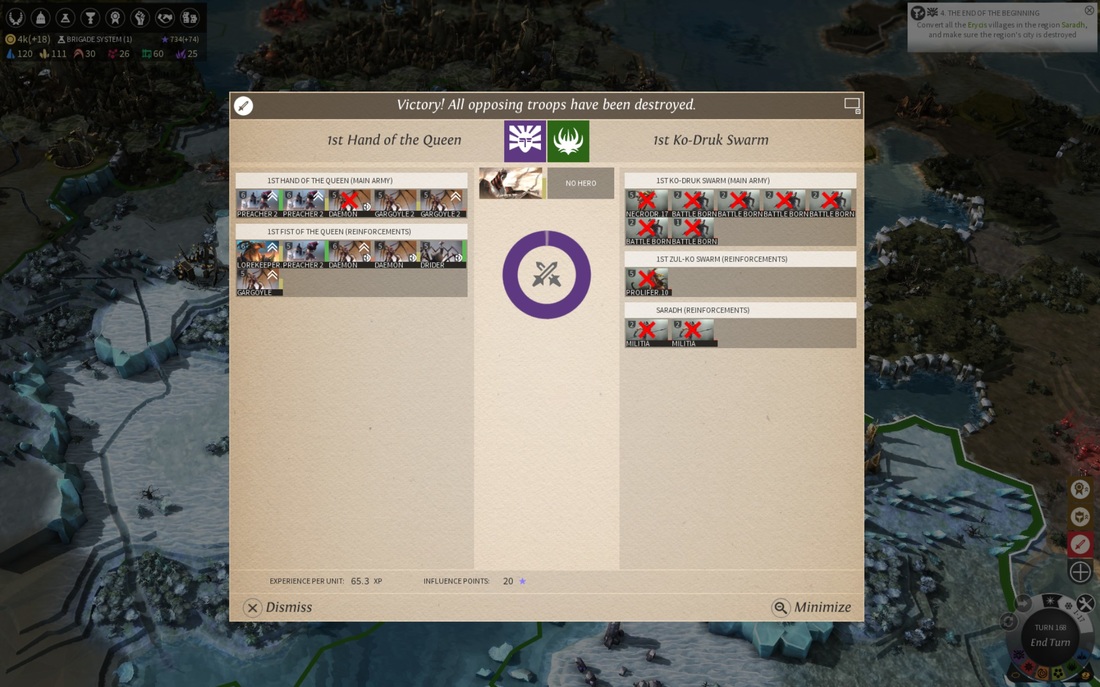
Now I'll admit to a bit of save-scumming here. After that painful attack before, their army moves away and leaves the city seemingly undefended. I considered launching an attack to see if the city was actually vulnerable, but didn't want to get caught out by an army (you can't cancel attacks once you make them), so I saved the game. Then I felt a bit cheap about doing that and ended turn instead. But next turn along comes another Necrophage army, this time led by a hero, and now he's close enough to get the benefit of the city defence despite being miles away. This annoyed me enough to reload that save and try it, and sure enough, it was actually empty and I burnt it. I don't object to nearby armies helping defend a city under attack, but they should only get the defensive bonus if they're actually inside the city.
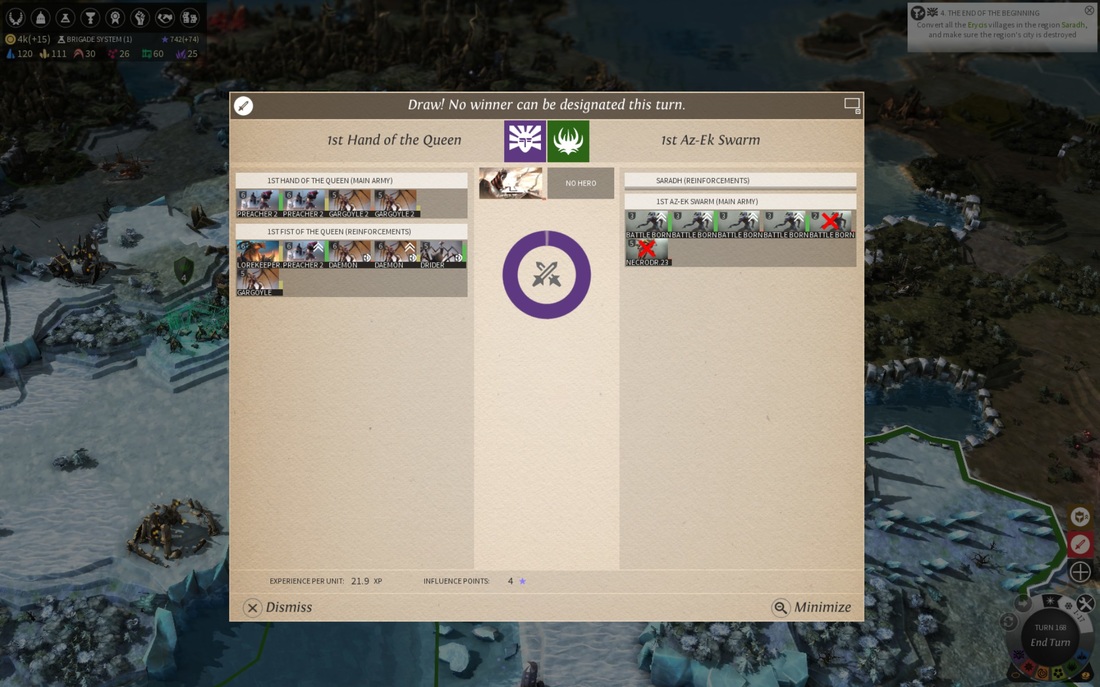
So, Saradh is clear of cities - now I just have to convert all the settlements present. Joyfully, there's only one village in the whole region, so I sprint over there and thankfully have the influence to convert it (maybe I'm being thick, but I couldn't find a way to see how much influence it cost to convert a village before doing it, which was annoying). The next stage of this epic quest is... destroy a roaming army of three snake monsters. Considering I had to invade an entire country and burn four cities to get to this point, some random monsters don't pose much of a threat. I cut them down and head to the coast to sail home.
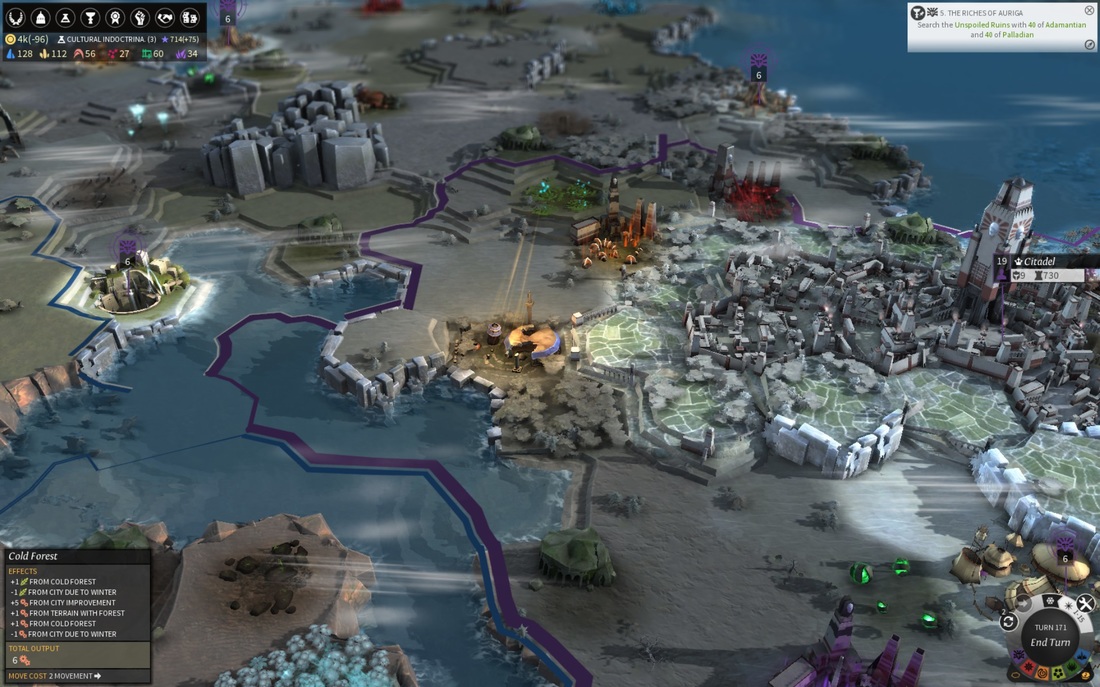
My next mission is to begin searching some ruins while holding a quantity of rare materials to unlock some kind of greater power. Those ruins are very near Citadel - I'll need to trade for Palladian ore (or convert more villages near deposits of it to increase my income) but it looks like an easy quest compared to that last one. Fittingly, winter falls a turn after I defeat the snake monsters and start the next stage of my faction quest. A good time to end this entry.
 RSS Feed